The Making of a Gallery Wall
How I helped my client (sister) create a collected, personal display from across the country.
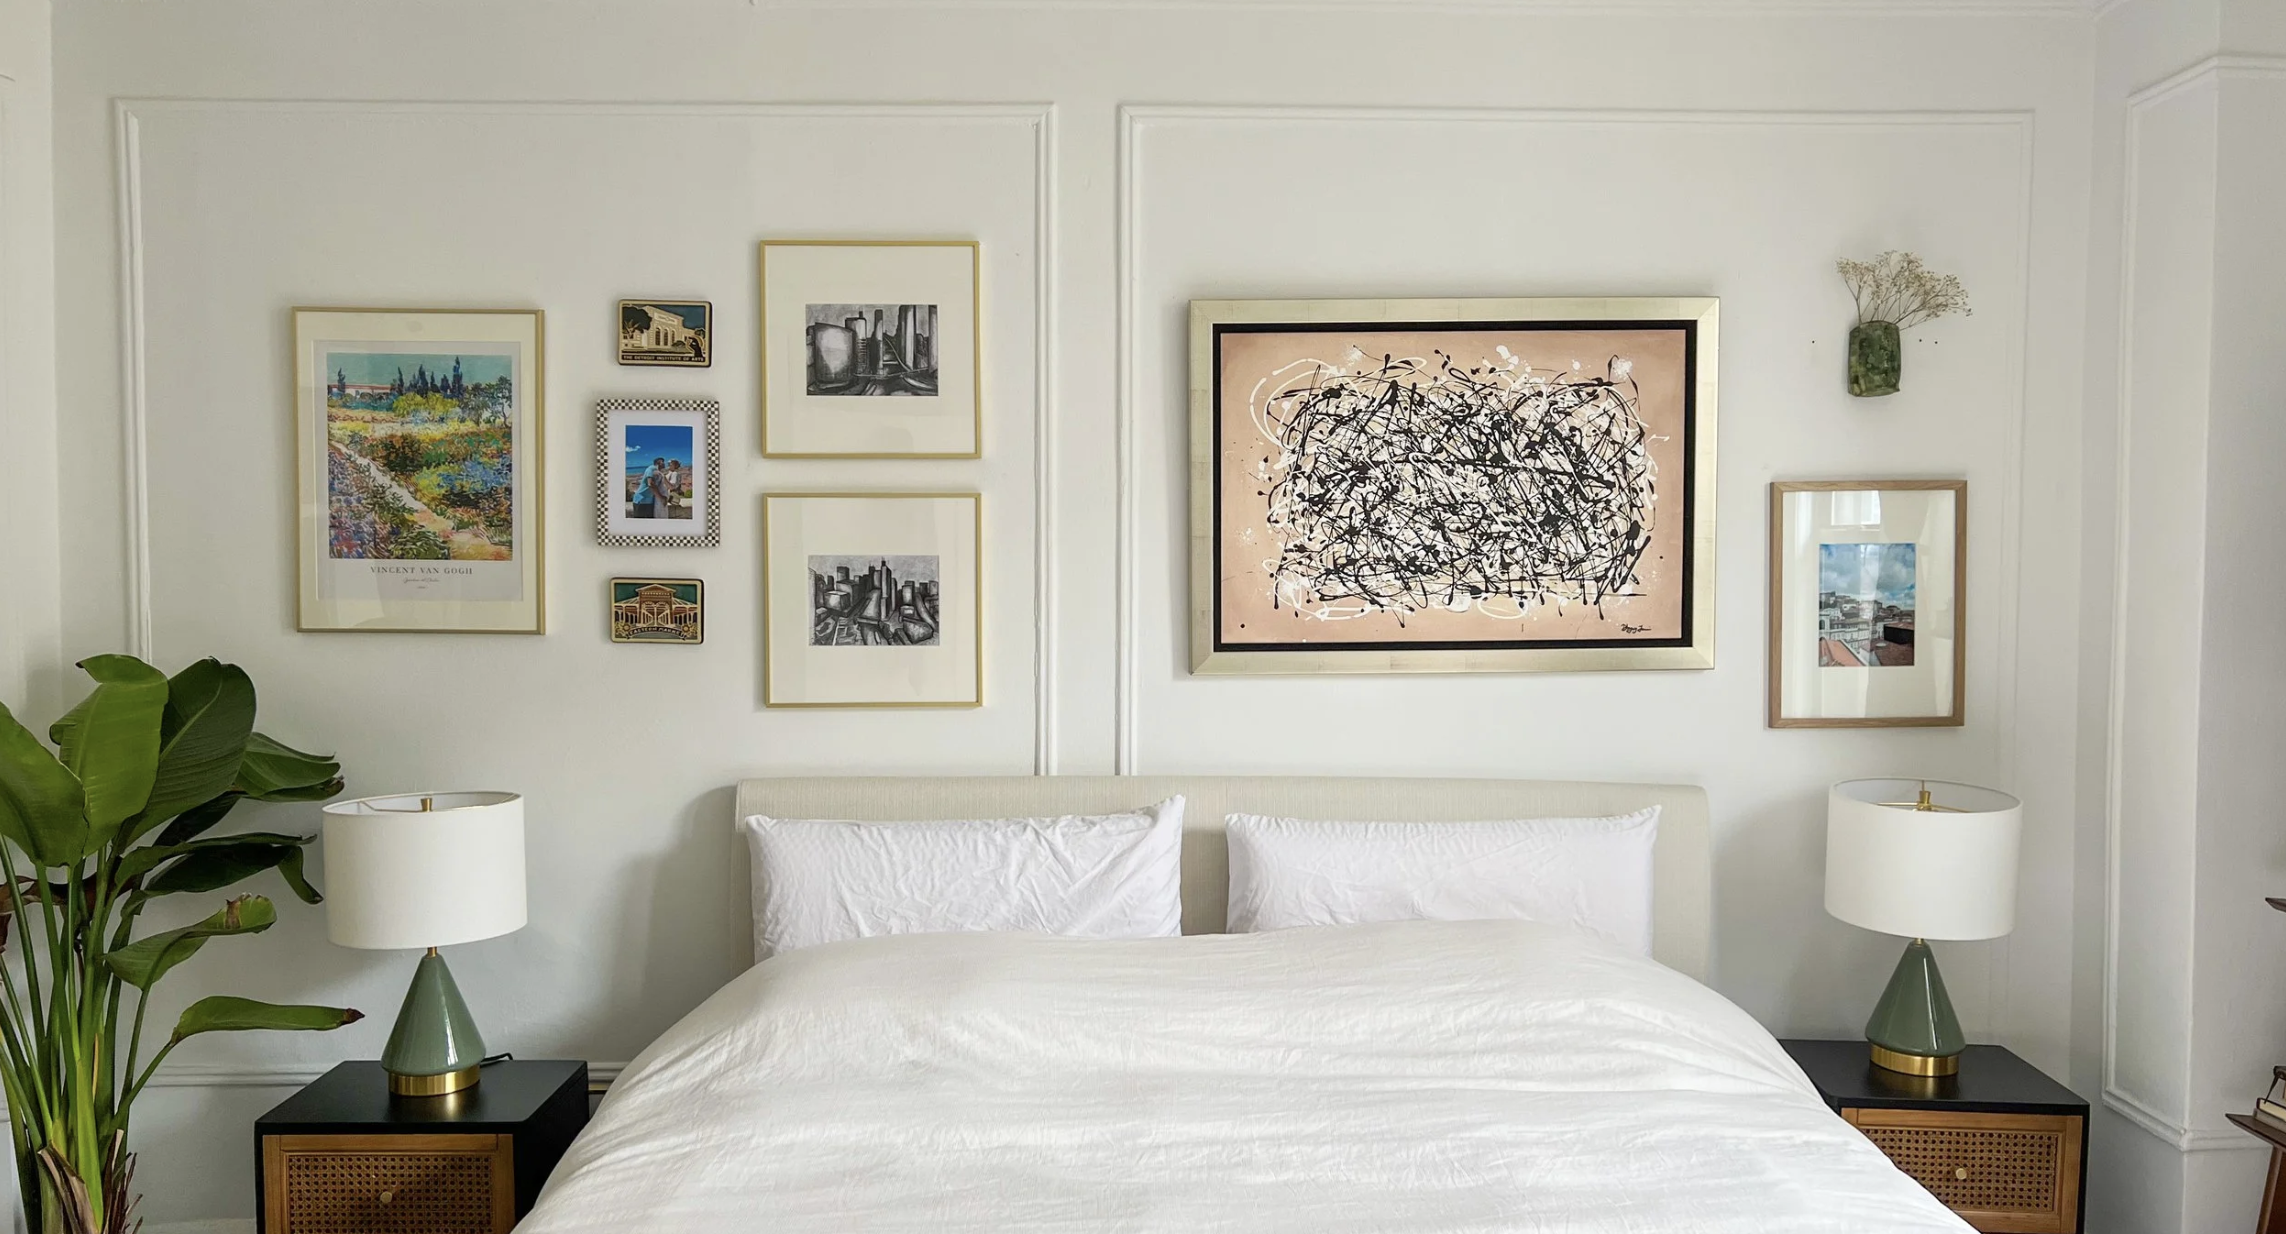
This post is mainly for three types of people:
Those who love gallery walls and just want to see how the sausage is made (metaphorically speaking of course. I don’t make my own sausage.)
Those who are skeptical of gallery walls and don’t understand how the sausage is made (ugh, I can’t leave that one alone - can I?!)
My sister’s boyfriend, Willy. Willy - I am only posting about Nina’s old apartment with her ex because I really loved how this space came together. IT HAS NOTHING TO DO WITH HIM, OKAY?? I’m rooting for you buddy. When you guys move in together, give me a call and I can show you how the sausage is made (GODDAMNIT).
In full transparency, this is not a “how to achieve the perfect gallery wall” post. I don’t think there’s a foolproof formula for that, and the hundreds of holes in my wall when trying to achieve the “perfect gallery wall” are a testament to that. Instead, it’s another Behind the Design that will hopefully give you more confidence in how you could start to pull your space together (plus I just wanted a dedicated space online to shout out Willy and tell him how much I love him for my sister where he might not ever see it. But also, do you plan to propose like the Empire State Building scalers? I hope so).
Where to Start:
First, you have to identify both your obstacles in the space and the decor you want to reuse.
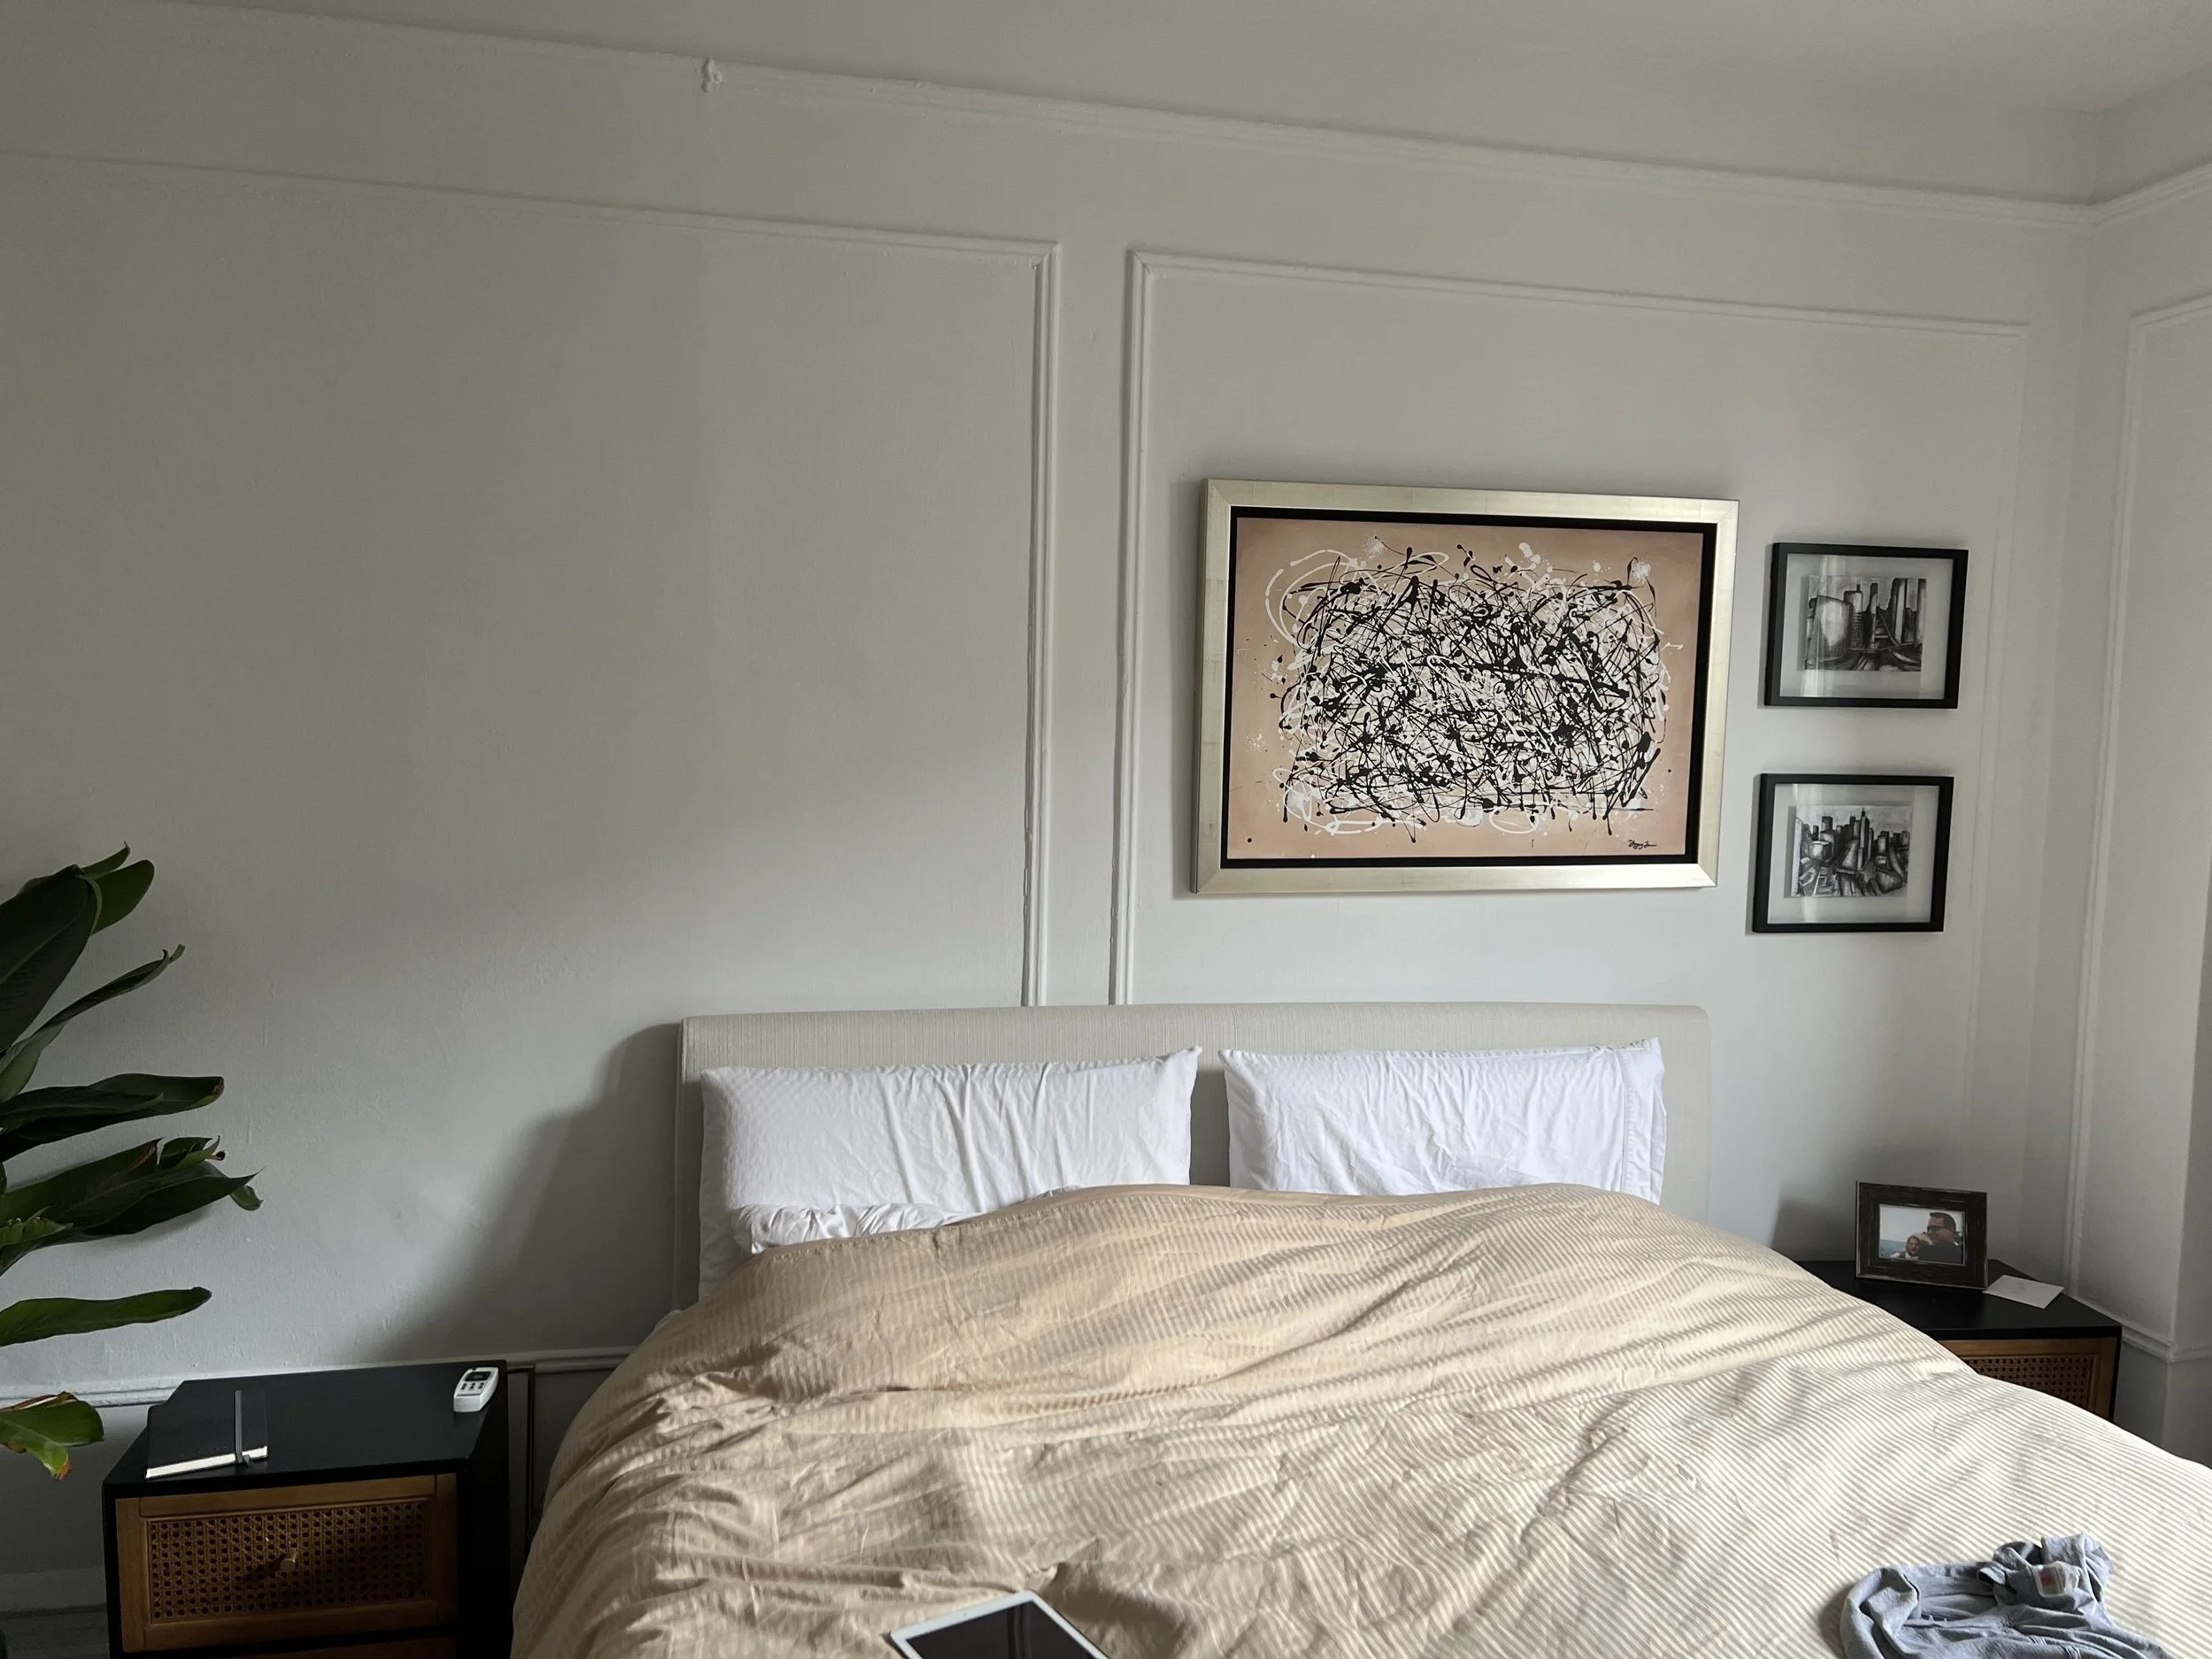
OBSTACLES:
The bed needed to be off-center from the wainscoting on the wall (to make room for a desk). And because it’s a rental, they could not move the wainscoting! All you symmetry-lovers, look away.
This wasn’t gallery-wall related, but they had no accent lights.
DECOR:
The Pollack painting and 2 charcoal sketches needed to stay. The rest of it was up for interpretation.
The Middle Part:
Measure Out The Wall and define the space you have to work with.
For this… I knew that the “working wall” meant above the headboard, below the top rail of the wainscoting, and between the outer edges of the nightstands.
Lay Out Decor Options via a free program (like Canva or Google Slides). Start by taking a picture of your space head on, upload it to your program, and then layer in different pieces of art, decor, or photos you might like. This will help you understand what colors look good together, where you might need to layer in variety for materials, etc. and it will (hopefully) save you from buying things before you know how they cohabitate.
For this… I knew my client well (and have changed her diapers before I might add). She’s a skilled photographer, she loves supporting local artists, and she frequents museums in her neighborhood. That meant her wall was a great spot for pictures from her trip to Portugal, wall tiles from our hometown’s infamous tile shop (holla Pewabic!) and then poster prints from her favorite artists.
Identify placement for your decor by laying things out on the floor to see where things might make sense, or try marking up your walls with painters tape to visually understand the placement and scale.
For this… and for my projects in general, I’m able to input measurements into my 3D program, and that helps me understand proportions, placement, and scale at a granular level. STILL, it’s always helpful to map things out on the floor or on the wall because nothing is more helpful than viewing a physical mock up in person.
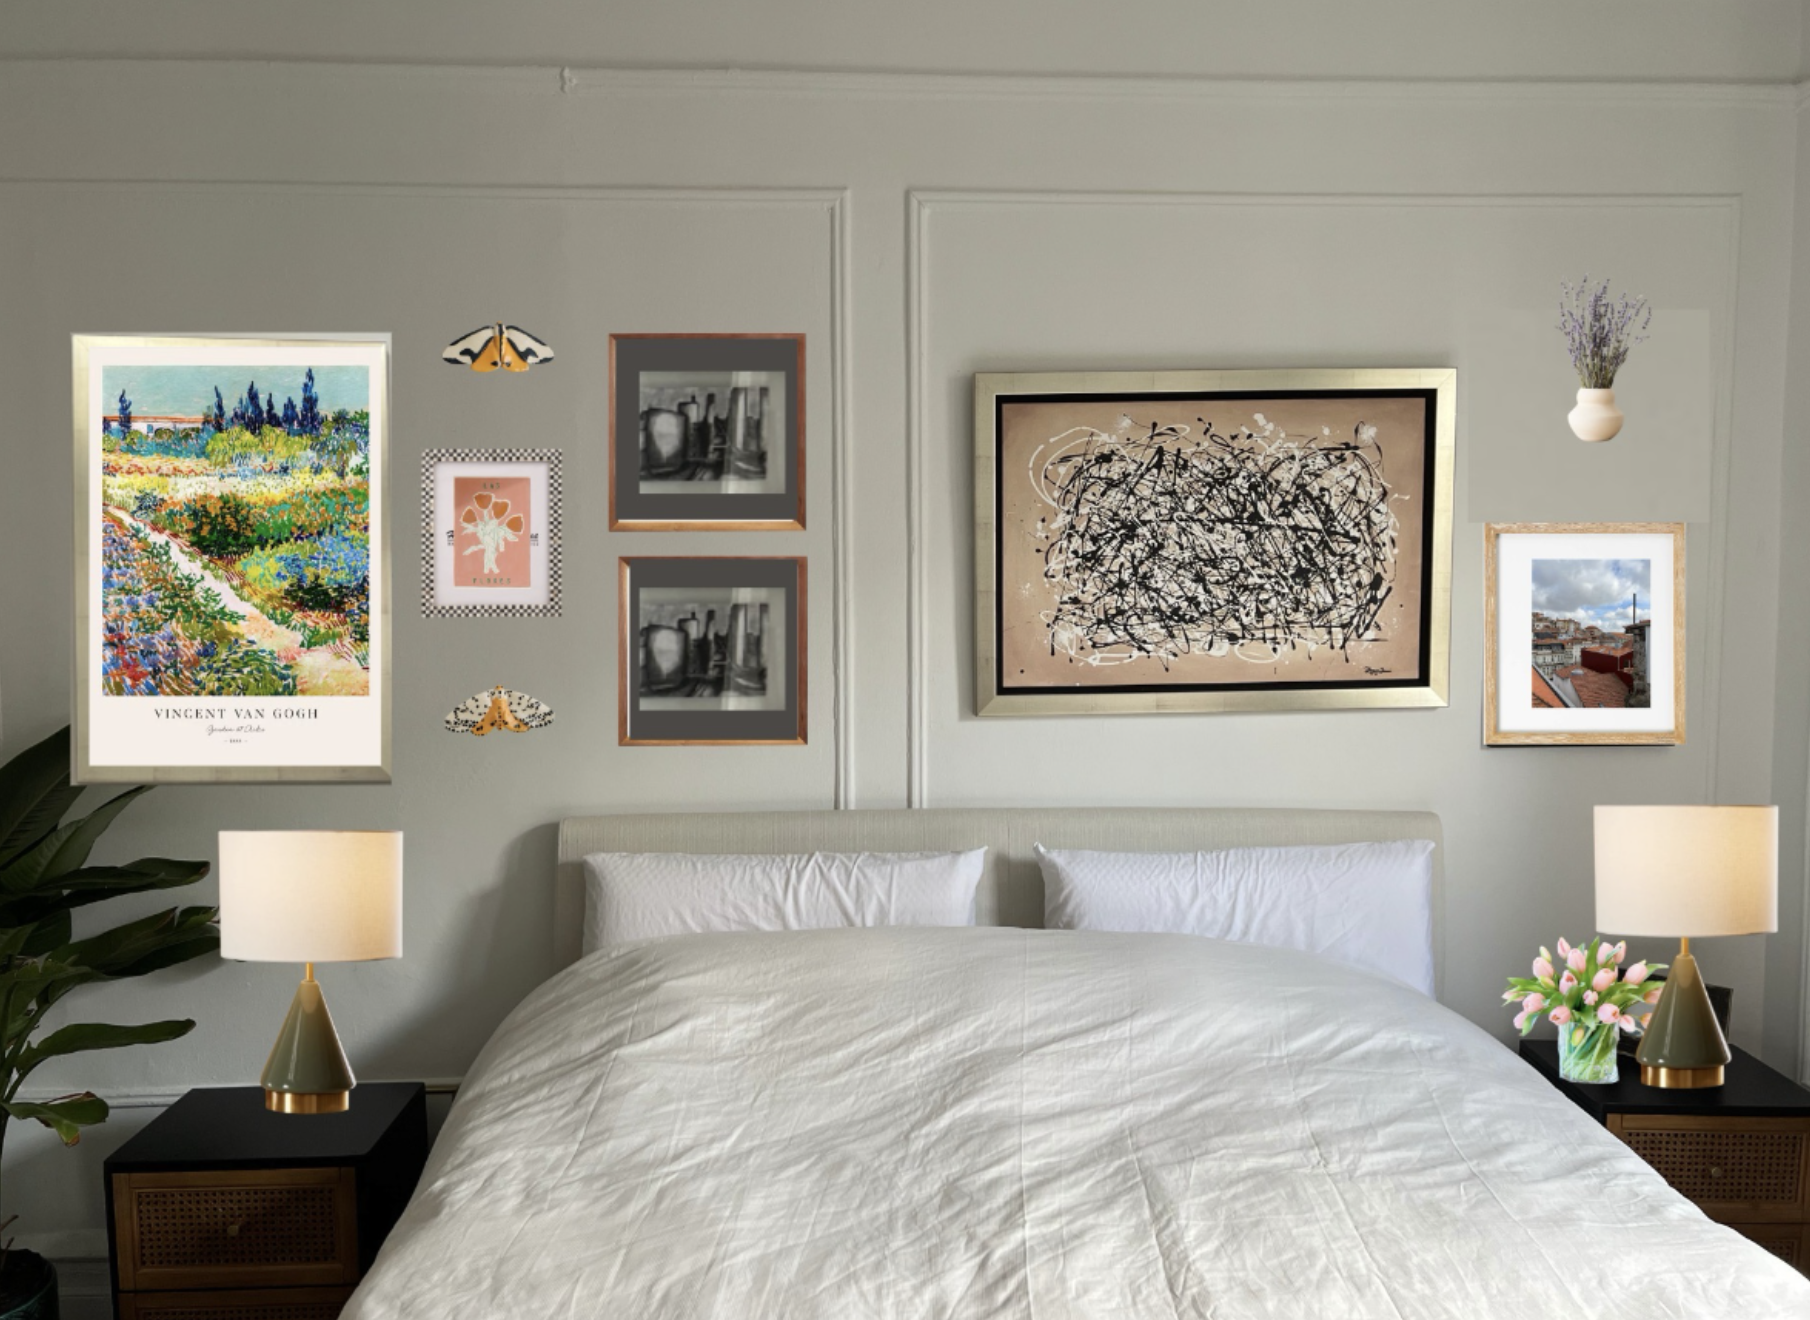
Before she made any purchases, I mocked up suggestions for decor and placement. My processes always start with an intake form, then the design creation, then design review, then the revisions. After this mock up, she realized:
She loved the table lamps
She liked the idea of reframing the charcoal prints, but didn’t necessarily want to go with a dark mat
She liked the ceramic butterflies but her boyfriend didn’t (dumped him. jk.)
The Final Edit:
Gallery Wall - FAQ Lightning Round
Are gallery walls out of style?
Something that brings you joy cannot go out of style. And even if you get sick of it, guess what… you can change it!
Are gallery walls hard to hang?
No, but that’s also coming from someone who is okay punching 100 holes in the wall to get the right configuration. We didn’t go this route for this project, but I’ve always found success in measuring out the wall space, sectioning off that same size on the floor, arranging decor until it looks/feels good, then bringing each piece up to the wall to hang one by one (starting in the center and working your way out).
What should I prioritize in sourcing first - art or frames?
This is the biggest chicken or egg question I SWEAR! I personally like to start with the art that needs to stay, then I source frames I like, then that gives me more direction in terms of art sizing.
What is something I need to pay attention to when composing a GW?
The frames + decorative contrast! Frames should be high quality (that doesn’t necessarily mean expensive), you should have mat board in some (if not all), and they should differ in material, color and size. By decorative contrast - I mean you should consider incorporating pieces that aren’t just pictures or paintings or posters. Try a ceramic wall plate, or a wall vase, or a plate! The contrast makes it feel lived in, fun and collected.
Is a gallery wall too busy?
It can be. If your wall is small, maybe a small vignette of 2-3 pictures makes more sense. If your wall is enormous, a gallery wall might be a daunting undertaking. Try testing out the “measuring the wall and testing on the floor” method first. You’ll get a sense of what feels insane and what feels comfortable.
And lastly, for some comedic content… here are four snapshots of our photo exchanges during the “gallery wall” project. Someone check on us.